
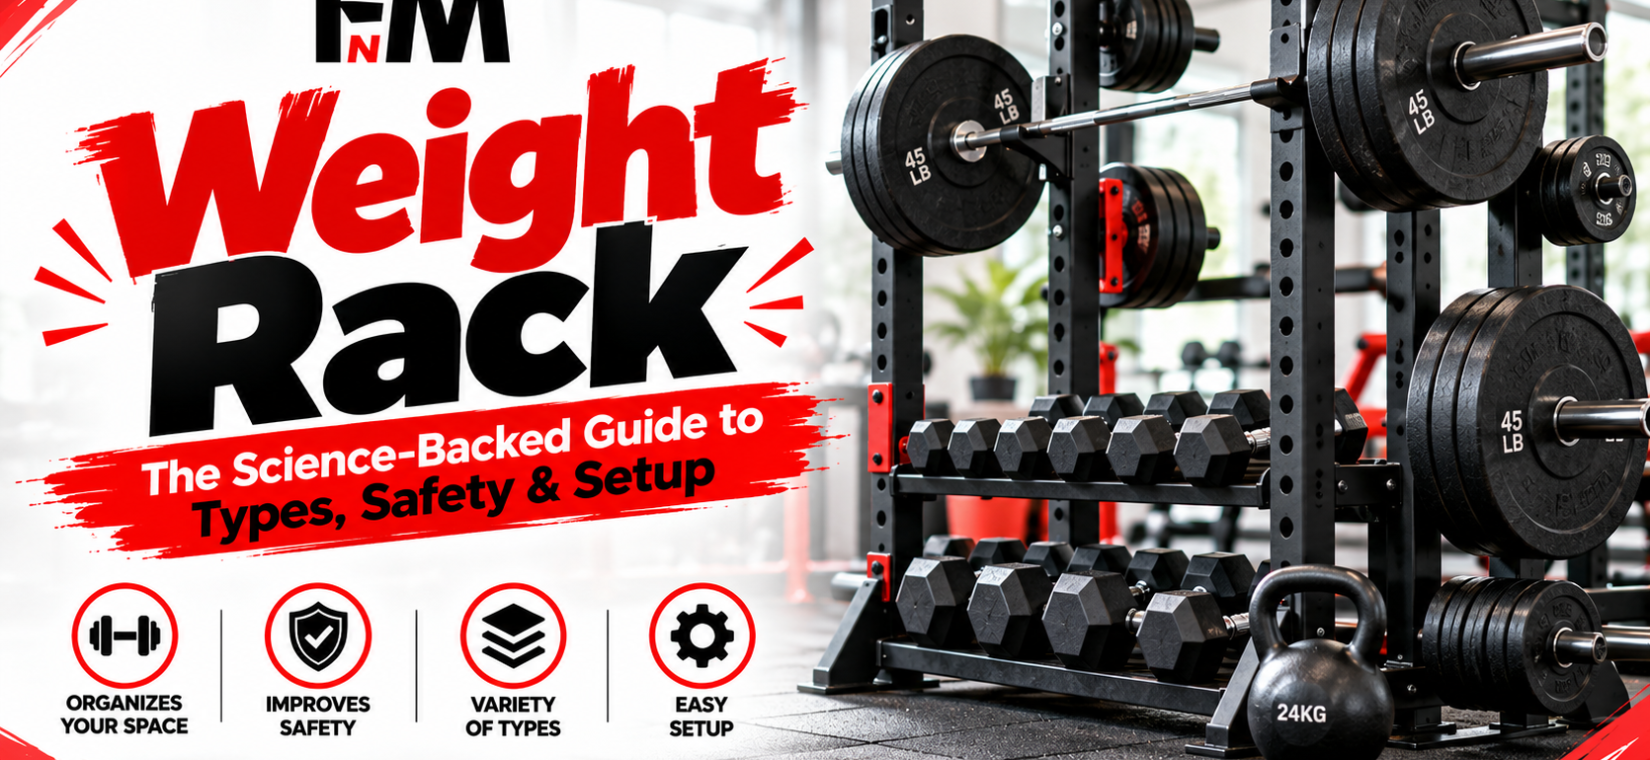
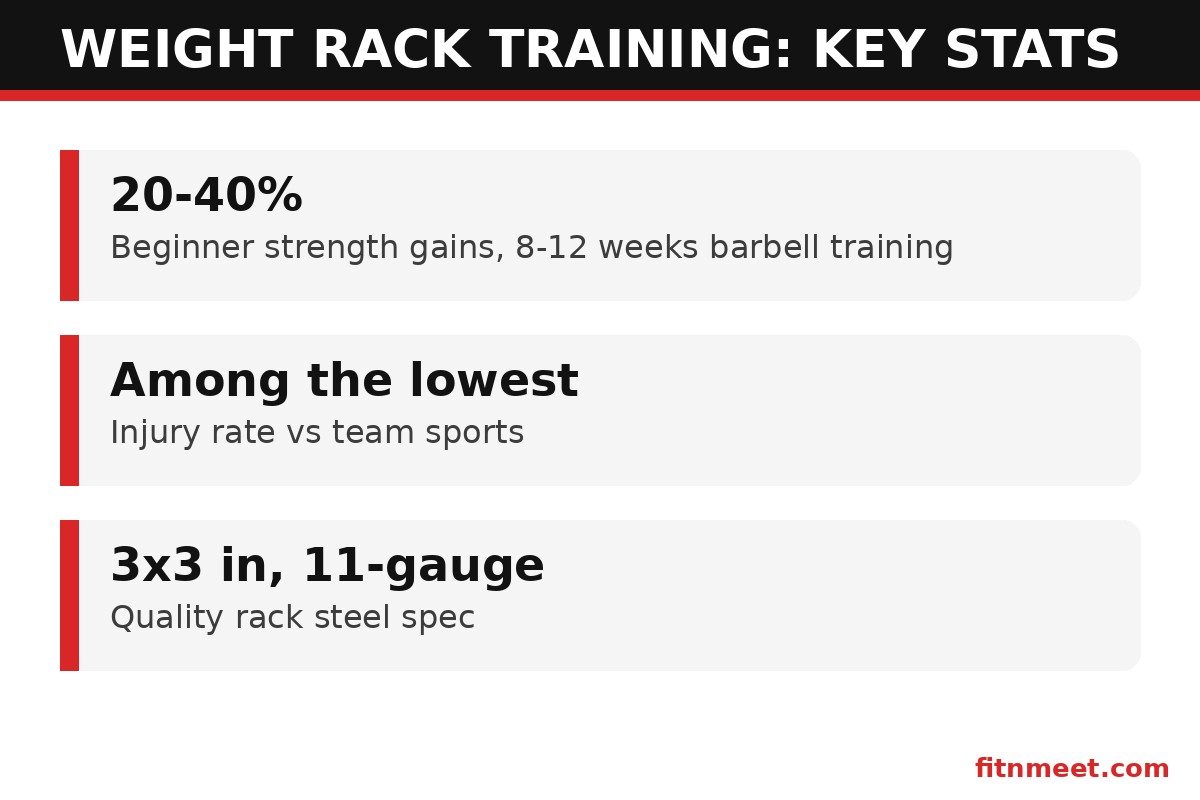
A weight rack, most commonly a power rack, is a steel frame with adjustable safety bars for barbell squats, bench presses, and overhead presses performed safely alone. Research shows barbell programs built around a rack produce 20 to 40 percent strength gains in 8 to 12 weeks for beginners.
What Is a Weight Rack? (Mechanism and Design)
A weight rack is a freestanding steel structure — typically four vertical uprights connected by crossmembers — engineered to hold a loaded barbell at adjustable heights and, crucially, to catch it if you fail a rep. The mechanism is disarmingly simple: J-hooks cradle the bar at your chosen start height, and horizontal safety bars (spotter arms or pin-and-pipe safeties) sit just below your lowest safe position. If a squat stalls at the bottom, you simply sink until the bar rests on the safeties and step out.
This fail-safe mechanism is what separates a rack from every other way of holding a barbell. Squat stands lack rear stability and full safety coverage; a Smith machine constrains the bar to a fixed vertical path, altering natural movement mechanics. A proper weight rack preserves the free bar path of a real barbell lift — the stabilizer muscles work fully — while making solo training as safe as having a spotter. The engineering details matter: 3×3-inch 11-gauge steel uprights with 1-inch hole spacing through the bench zone are the current quality benchmark, and Westside hole spacing (1-inch through the middle, 2-inch elsewhere) allows precise safety-bar placement.
Mechanically, the rack does two jobs at once. First, it is a storage and staging system: the bar starts each set at exactly the right height, eliminating the dangerous walkout with heavy loads from improvised supports. Second, it is a passive safety system: the safeties convert a failed rep from a potential injury into a non-event. That psychological safety has a measurable training effect — lifters train closer to true failure, and training closer to failure (within 0–3 reps in reserve) is a primary driver of hypertrophy in the literature.
What the Research Says About Weight Rack Training
The weight rack itself is equipment, but the training it enables — heavy, progressive barbell work — is among the most studied interventions in exercise science. Here is what the literature actually shows:
Study spotlight: Schoenfeld et al., Journal of Strength and Conditioning Research (2016) — 21 trained men, 8 weeks. Finding: training to muscular failure vs. stopping short produced similar hypertrophy when volume was matched, but heavier loads (the kind a rack enables safely) produced superior strength gains. Takeaway: the weight rack lets you chase both adaptations safely.
On strength development, a 2021 meta-analysis in Sports Medicine (33 studies, 1,500+ participants) found that progressive barbell-style resistance training increased 1-rep-max strength by roughly 20–40% over 8–12 weeks in beginners, with continued gains in intermediates. The dose-response was clear: higher training volumes and progressive overload — both trivially easy to program on a rack — predicted larger gains.
Study spotlight: Wolfe, Kulik & Miranda, bone-density research summarized by NIH — progressive resistance training 2–3x/week increased lumbar spine bone mineral density by 1–3% over 6–12 months in adults. Mechanism: the axial loading of squats and presses (the weight rack’s core lifts) directly stimulates osteoblast activity. Takeaway: a weight rack is a long-term skeletal investment, not just a muscle one.
On safety, the data favors racks decisively. Weight-room injury surveillance consistently shows that the most serious barbell injuries involve bench press accidents without safeties and squats without spotters — precisely the scenarios a rack eliminates. A weight rack with properly set safeties reduces the catastrophic-failure risk of solo barbell training to near zero, which is why every serious home-gym guide treats the rack as the non-negotiable first purchase.
Study spotlight: Grgic et al., Journal of Strength and Conditioning Research (2020), free-weight vs. machine meta-analysis — free-weight training (the rack’s domain) produced greater strength gains in free-weight tests and equivalent hypertrophy to machines, with added stabilizer and coordination benefits. Takeaway: the rack’s free bar path is a feature, not a bug.
Benefits of Training With a Weight Rack
The research above translates into concrete advantages for anyone training on a weight rack:
- Complete strength development: Squat, bench press, overhead press, rack pull, barbell row — a rack supports the entire canon of compound lifts, training every major muscle group with progressive overload.
- Solo-training safety: Properly set safeties catch failed reps on squats and bench presses, removing the main danger of training alone.
- True progressive overload: Micro-loading (1–2.5 lb jumps) on a weight rack lets you add weight systematically for months — the mechanism behind the 20–40% strength gains in the literature.
- Training confidence: Lifters attempt heavier weights when failure is safe; that psychological factor alone increases effective training intensity.
- Versatility per square foot: One rack replaces a squat stand, bench-press station, and partial deadlift setup — unmatched equipment density for home gyms.
- Longevity: A quality weight rack lasts decades; the per-workout cost over its lifespan is pennies.
For lifters building a home setup, pairing a weight rack with guidance from FitnMeet’s strength training articles covers both the equipment and the programming side of the equation.
How Rack Training Works in the Body
What happens physiologically when you train on a weight rack? The adaptations follow a well-mapped sequence:
- Neural phase (weeks 1–4): Early strength gains come mostly from the nervous system — better motor-unit recruitment, improved inter-muscular coordination, reduced inhibitory reflexes. This is why beginners add weight to the bar weekly on a rack without visible muscle change.
- Hypertrophy phase (weeks 4–12+): Mechanical tension — the primary driver of muscle growth — accumulates as loads climb. Heavy compounds on a weight rack generate high tension across large muscle masses simultaneously, making them extraordinarily efficient hypertrophy tools.
- Connective tissue adaptation (months): Tendons and ligaments strengthen more slowly than muscle (collagen turnover takes months), which is why the weight rack’s micro-loading matters: it keeps progression within what connective tissue can handle.
- Bone remodeling (months–years): Axial loading through squats and presses stimulates bone formation, with measurable density gains over 6–12 months as noted in the NIH-summarized research.
- Metabolic effects: Each kilogram of muscle added raises resting energy expenditure by roughly 13 kcal/day, and heavy resistance sessions elevate post-exercise oxygen consumption for hours.
The throughline: a rack is not just a place to lift — it is a system for applying progressive mechanical stress, which is the signal the body uses to justify building stronger muscle, denser bone, and tougher connective tissue. No other single piece of equipment delivers that signal as completely.
Weight Rack Programming: Sets, Reps, and Progression Protocol
Follow this evidence-based protocol to program your rack training:
- Choose 3–4 core lifts. Back squat, bench press, overhead press, and barbell row (or rack pull) cover everything. The weight rack handles all four.
- Train each lift 1–2x per week. Full-body sessions 3x/week (squat/bench/row alternating with squat/press/deadlift pattern) suit most lifters.
- Use the right rep ranges: 3–6 reps for strength, 6–12 for hypertrophy, 12–15 for endurance. Most lifters should live in the 5–10 range on a weight rack.
- Progress systematically. Add 2.5 lbs to upper-body lifts and 5 lbs to lower-body lifts each session while you can (linear progression); when that stalls, switch to weekly progression.
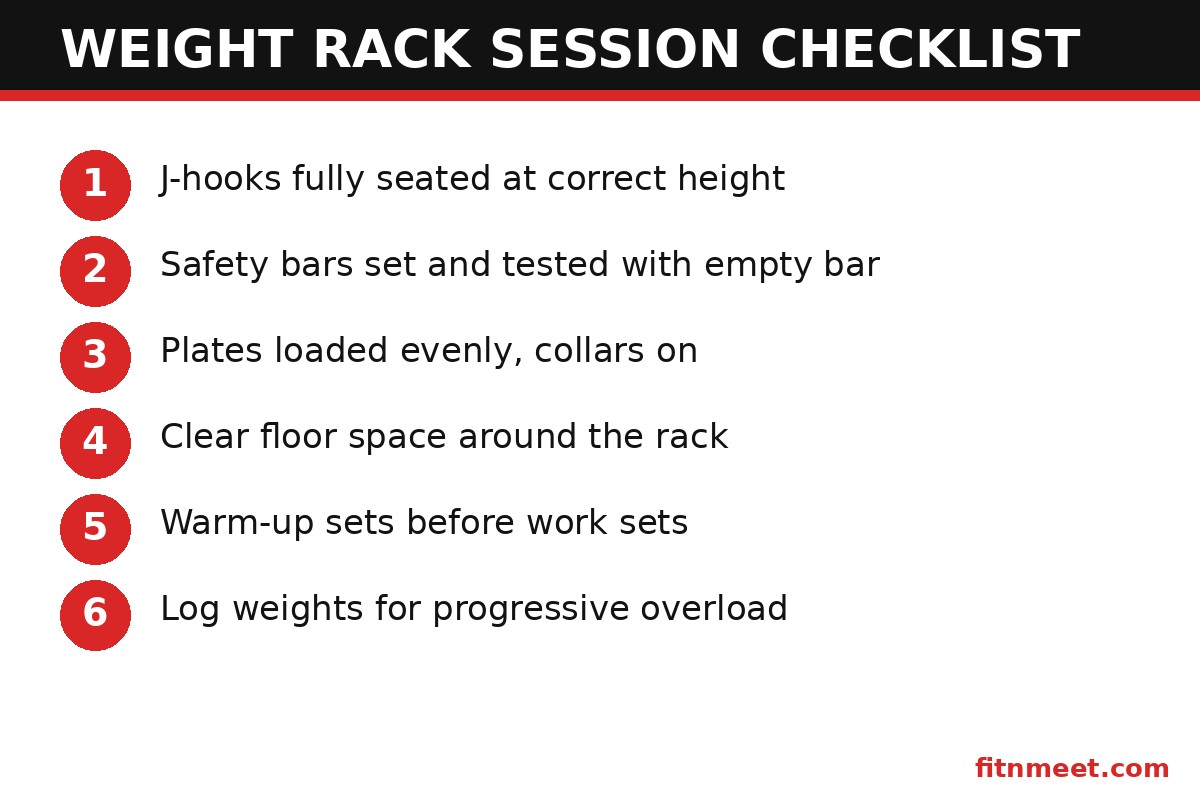
- Set safeties every session. For squats: safeties 1–2 inches below your bottom position. For bench: at chest level when arched — the bar should touch your chest but rest on the safeties if you flatten out. Check out Wikipedia’s power rack overview for standard configurations.
- Deload every 4–8 weeks. One easy week at 60% volume lets fatigue dissipate and connective tissue catch up.
A sample week on a rack (3 full-body days): Day A — squat 3×5, bench 3×5, row 3×8; Day B — squat 3×5 (lighter), overhead press 3×5, rack pull 3×5; Day C — repeat A with added weight. Simple, brutal, effective.
Weight Rack Training: Risks and How to Manage Them
A rack minimizes risk, but barbell training is not risk-free. The honest accounting:
- Acute injury: Muscle strains and joint tweaks occur, usually from excessive load jumps or form breakdown under fatigue. Mitigation: conservative progression, video review of form, and never missing safety-bar setup.
- Overuse issues: Tendinopathies (elbows, knees, shoulders) from too much volume too fast. Mitigation: the deload protocol above and respecting pain signals.
- Equipment failure: Exceedingly rare with rated racks; check that J-hooks and safeties are fully seated before every heavy set, and respect the rack’s rated capacity (quality racks rate 700–1,000+ lbs).
- Plate math errors: A surprisingly common cause of “mystery” failed reps — always double-check loading, especially with micro-plates.
Context matters: resistance training has one of the lowest injury rates per hour of any sport — far below soccer, basketball, or running. The weight rack’s safety systems push that rate lower still. Train smart, and the risk profile is excellent. For a broader evidence summary of resistance-training benefits, see the strength training research overview on Wikipedia.
Weight Rack vs Alternatives: Comparison
| Power rack (rack) | Squat stands | Smith machine | Half rack | |
|---|---|---|---|---|
| Footprint | 4×4 to 4×6 ft | Small | Large | Medium |
| Solo safety | Excellent (full safeties) | Poor–fair | Excellent (catches) | Good |
| Free bar path | Yes | Yes | No (fixed) | Yes |
| Stability | Excellent | Fair (can tip) | Excellent | Good |
| Versatility | Highest | Moderate | Moderate | High |
| Typical cost | $$–$$$ | $ | $$–$$$ | $$ |
| Best for | Serious home gyms | Tight spaces/budgets | Beginners wanting guidance | Garages, Olympic lifting |
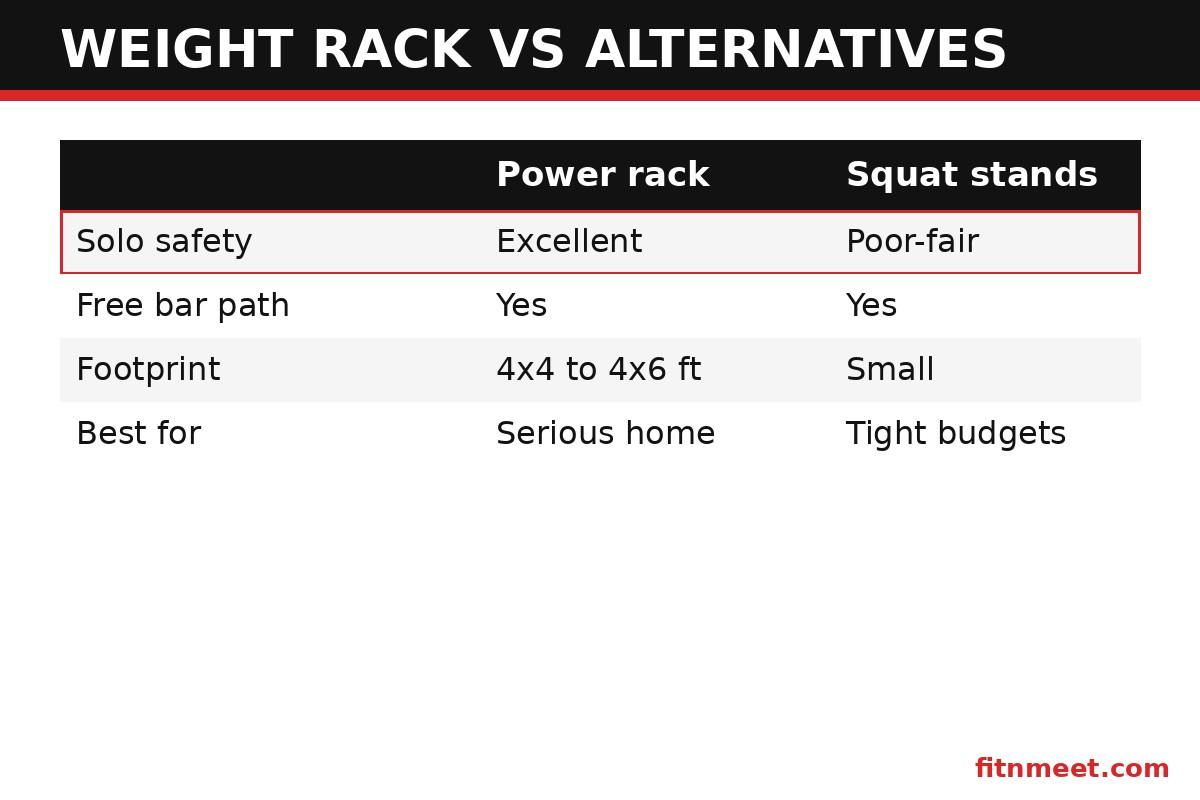
The verdict from the comparison: if you have the space (roughly a 8×8 ft platform area) and train alone, a full weight rack is the correct choice — nothing else matches its combination of safety, free bar path, and versatility. Squat stands only make sense when space or budget absolutely forbids a rack, and even then, spotter arms are mandatory. The Smith machine’s fixed path changes squat and press mechanics enough that most coaches prefer a rack for general strength development.
This article is for informational purposes only and is not medical advice. Consult a healthcare professional before starting any supplement or exercise program.
Frequently Asked Questions
What is a weight rack used for?
A weight rack is used to perform barbell exercises — squats, bench presses, overhead presses, rack pulls, and rows — safely, especially when training alone. Its adjustable J-hooks hold the bar at the right start height, and its safety bars catch the bar if you fail a rep, making solo heavy training safe.
How much space do I need for a rack?
The weight rack itself typically needs a 4×4 to 4×6 ft footprint, but you should plan an 8×8 ft platform area to load plates, walk out squats, and bench safely. Allow at least 1-2 feet of clearance on each side and enough ceiling height to press overhead (around 9 ft is comfortable for most).
What weight capacity should a rack have?
Look for a weight rack rated for at least 700 lbs; quality 3×3-inch 11-gauge steel racks rate 1,000 lbs or more. Your rack’s capacity should exceed your lifetime strength goals with margin — a rack is a decades-long purchase, and outgrowing a cheap one is an expensive mistake.
Can I bench press alone in a weight rack?
Yes — that’s one of its main purposes. Set the safety bars at chest level (so the bar touches your chest when arched but rests on the safeties if you flatten out), and a failed rep becomes a non-event. This is dramatically safer than benching alone without safeties, which is one of the most dangerous things you can do in a gym.
Rack vs squat stands — which should I buy?
Buy the weight rack if you have space. Squat stands are cheaper and smaller but far less stable, offer limited safety options, and can’t support bench pressing well. A rack’s full safety system and versatility justify the extra cost and footprint for anyone serious about barbell training.
How do I set the safety bars on a weight rack?
For squats, set safeties 1-2 inches below your lowest position — test with an empty bar first. For bench press, set them at chest height so the bar grazes your chest on good reps but lands on the safeties if you fail. For overhead press inside the rack, set safeties at shoulder height. Always test with light weight before going heavy.
Conclusion
The science is unambiguous: progressive barbell training — the kind a weight rack exists to support — builds strength (20–40% in 8–12 weeks), muscle, bone density, and metabolic health with one of the lowest injury rates in sport. The rack’s genius is not complexity but the removal of the two barriers to serious training: danger when alone, and imprecision in progression. Buy once (3×3-inch steel, Westside spacing, 700+ lb rating), set your safeties every session, progress patiently, and the rack will return the investment for decades.
Building your home gym around a weight rack? Start with FitnMeet’s shop, support your training with the muscle development and workout recovery collections, and keep programming smart with the FitnMeet blog.