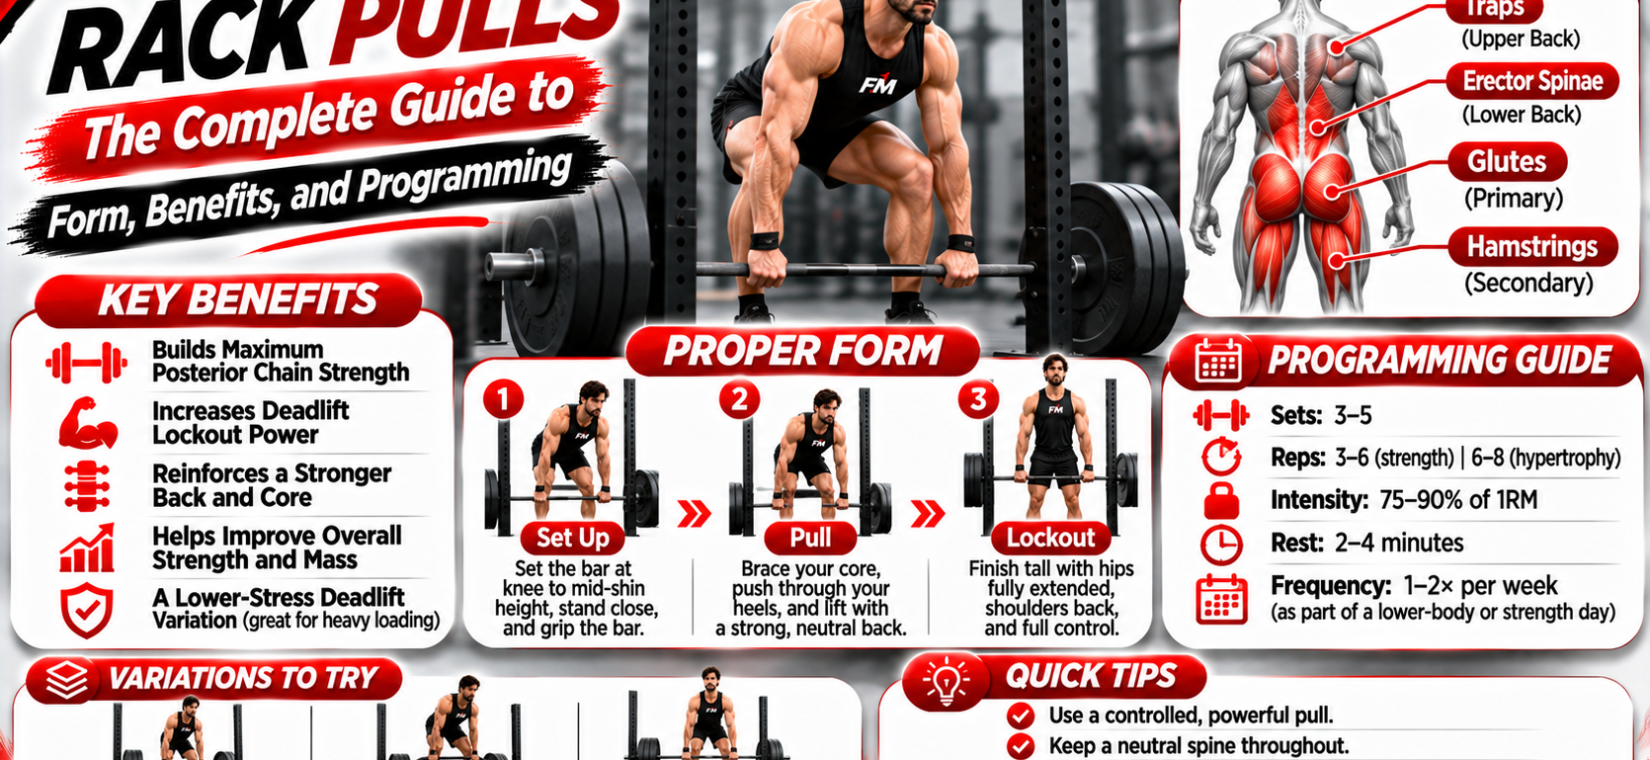
Rack pulls are a partial-range deadlift variation with the barbell starting on a power rack’s safety pins, usually at or just below knee height. The shortened range lets you load 10–30% more than your full deadlift, overloading the lockout, upper back, traps, and grip.
Rack Pulls: Quick Answer
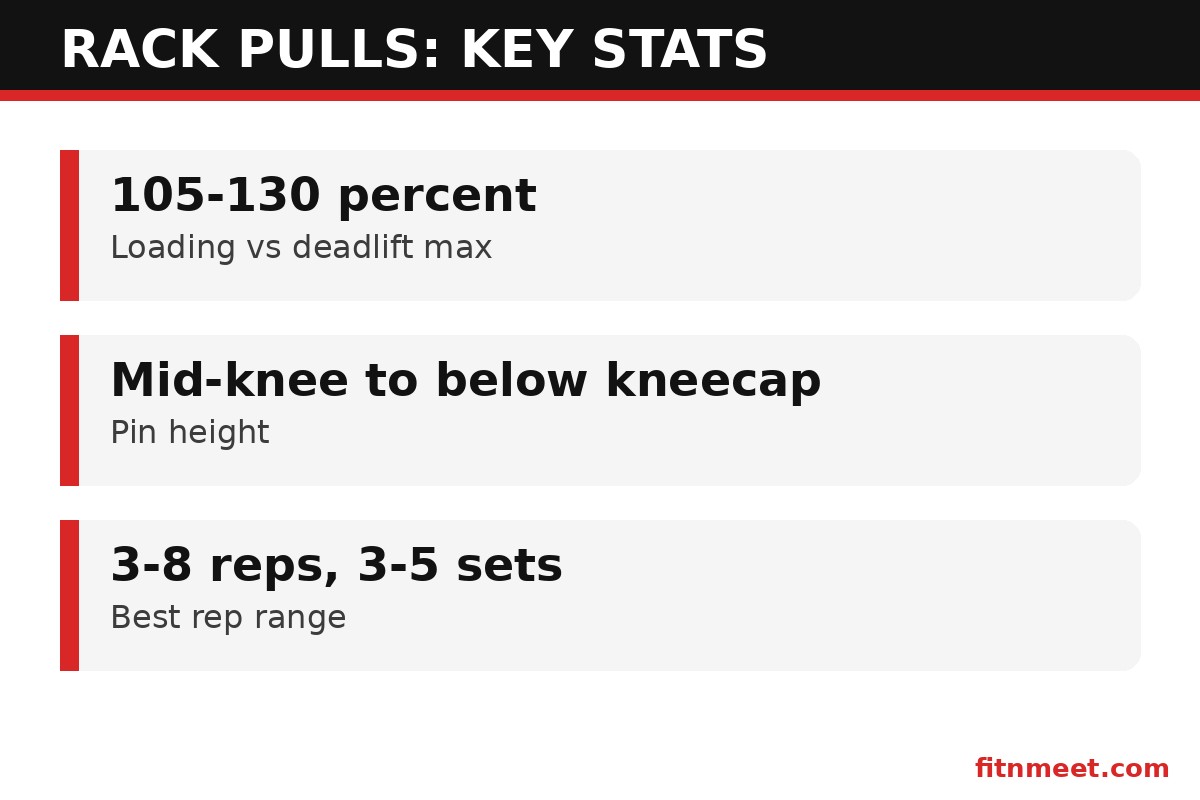
Rack pulls are heavy partial deadlifts from pins set at knee height. They build lockout strength, upper-back thickness, and grip by letting you handle supramaximal loads — typically 10–30% above your full deadlift. Program 3–5 sets of 3–8 reps weekly, always from a dead stop on solid pins.
What Are Rack Pulls?
Rack pulls are exactly what the name describes: deadlift-style pulls with the barbell resting on the horizontal safety pins (“rack”) of a power rack instead of the floor. The pins are usually set so the bar starts at mid-shin to just above the knee, eliminating the bottom portion of the deadlift where most lifters are weakest off the floor.
The movement originated in powerlifting circles as a lockout-specific overload tool. Powerlifters who stalled at the top of their deadlift — the bar clearing the knees but dying before lockout — needed a way to train that exact range with weights heavier than their full-range max. Rack pulls solved the problem: shorten the stroke, raise the load, and hammer the muscles responsible for finishing the lift.
The shortened range changes the muscular emphasis. Full deadlifts distribute work across the quads, hamstrings, glutes, and back. Rack pulls shift the demand upward: the traps, rhomboids, lats, spinal erectors, glutes, and forearms do the lion’s share. Your legs still contribute, but the star of the show is the entire posterior chain above the knee.
Why Rack Pulls Work
Rack pulls work through three mechanisms that training science supports. First, supramaximal loading: handling weights above your full-range max forces high-threshold motor unit recruitment. Your nervous system learns to fire more muscle fibers at once, and some of that neural adaptation carries over when you return to full deadlifts.
Second, targeted overload of the lockout. The deadlift’s sticking point for most lifters sits between the knee and mid-thigh. Rack pulls isolate exactly that zone, letting you accumulate far more quality volume at the sticking point than full deadlifts allow — your lower back would fatigue long before your lockout got enough work otherwise.
Third, time under tension for the upper back. Heavy rack pulls keep the traps, lats, and erectors loaded for the full duration of each set. Bodybuilders have long used them for back thickness for this reason: few exercises let you hold 140+ kg in your hands for 8 reps while the entire upper back works to keep the torso rigid.
The deadlift family includes many partial variations, but rack pulls remain the most accessible because nearly every gym has a power rack with adjustable pins — no blocks, mats, or specialty equipment required.
Step-by-Step Guide: How to Do Rack Pulls
Setup determines everything. Follow these steps precisely:
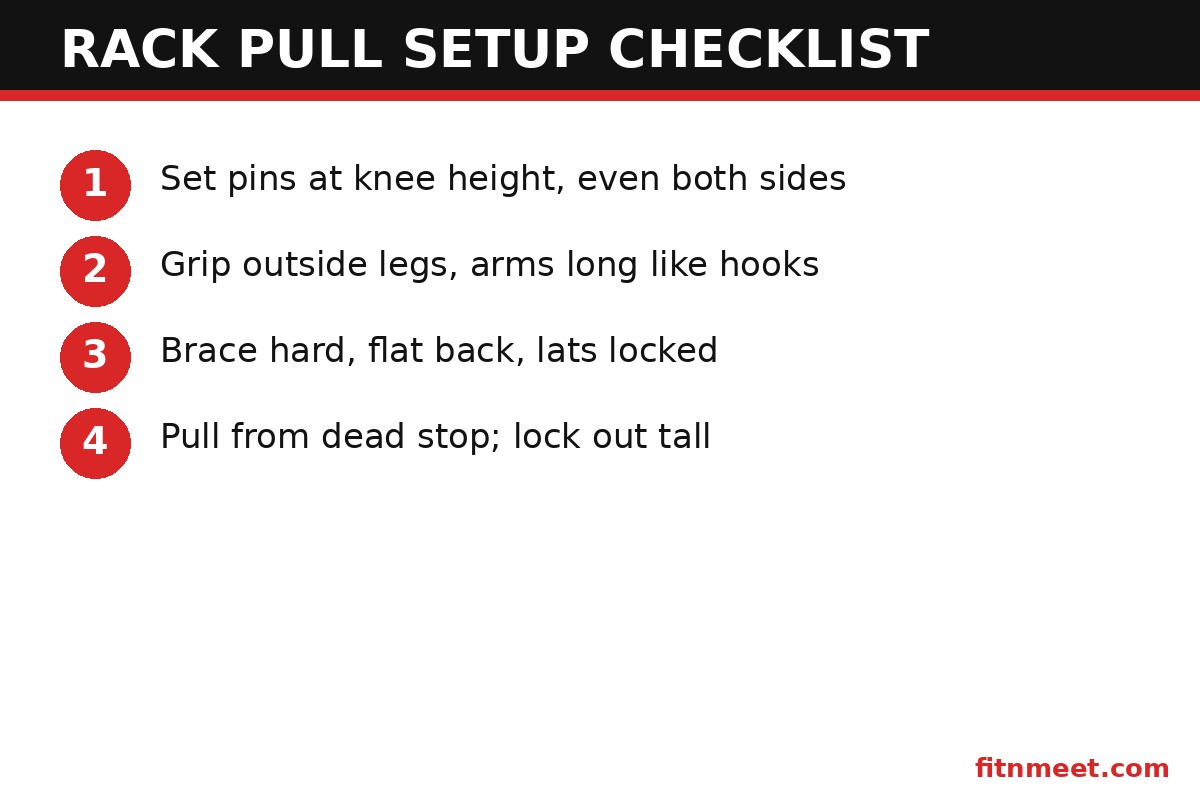
- Set the pin height. Start with the bar at mid-knee or just below the kneecap. Lower pins (mid-shin) emphasize more leg drive and a longer pull; higher pins (above the knee) maximize load and isolate the lockout. Beginners should start at knee height.
- Stand the bar on the pins and check: the bar should sit 2–5 cm in front of your shins when you stand close.
- Make sure both pins are at the same hole on each side — uneven pins twist the bar under load.
- Approach and grip the bar. Walk up so your shins nearly touch the bar. Hinge at the hips, bend the knees slightly, and take your normal deadlift grip (double overhand or mixed) just outside the legs.
- Arms stay long and straight — think of them as hooks, not pulling muscles.
- Set your grip width before you brace; adjusting mid-set under heavy load wastes position.
- Brace hard. Take a deep belly breath, push your abs out against your belt (if you wear one), and lock your lats by “bending the bar” around your legs. Your back should be flat or slightly arched — never rounded.
- Chest up, shoulders pulled back and down.
- Feel tension through your hamstrings and glutes before the bar moves.
- Drive through the floor. Push the ground away, extend the knees and hips together, and drag the bar up your thighs. The bar leaves the pins with a slight click — that is normal; do not yank it.
- Hips and shoulders rise at the same rate — do not let the hips shoot up first.
- Keep the bar in contact with your legs the entire way up.
- Lock out tall. Finish standing fully upright: hips through, knees locked, shoulders back. Squeeze the glutes and traps for a full second. Do not lean back excessively — vertical is the finish.
- Hold the top for 1–2 seconds on hypertrophy sets to maximize upper-back tension.
- Lower under control. Hinge back and guide the bar down to the pins. Let it come to a complete dead stop between reps — touch-and-go reps defeat the purpose of building starting strength from the pins.
- Reset your brace briefly between reps on heavy sets; constant-tension reps are fine for lighter hypertrophy work.
Rack Pulls Programming: Sets, Reps, and Frequency
How you program rack pulls depends on your goal. The movement is versatile, but it is also systemically demanding — treat it as a main lift, not an accessory afterthought.
| Goal | Sets × Reps | Load | Rest | Frequency |
|---|---|---|---|---|
| Maximal lockout strength | 5 × 3 | 105–115% of deadlift 1RM | 3–5 min | 1×/week |
| Back hypertrophy | 4 × 6–8 | 85–100% of deadlift 1RM | 2–3 min | 1×/week |
| Grip strength | 3 × 8–10 | 80–90%, double overhand | 2 min | 1–2×/week |
| Deadlift assistance | 3 × 5 | 100–110% of deadlift 1RM | 3 min | 1×/week, after speed work |
Place rack pulls on back day or deadlift day, early in the session while you are fresh. Because the loads are supramaximal, your central nervous system fatigues faster than the muscles suggest — most lifters do best with rack pulls once per week, replacing (not adding to) one heavy deadlift session. Run a 4–6 week block, then retest your full deadlift to measure carryover.
Benefits of Rack Pulls
- Lockout strength: the most direct benefit — overloading the exact range where deadlifts stall, with loads 10–30% above your floor max.
- Upper-back thickness: sustained heavy loading of the traps, rhomboids, and lats builds the dense, thick back that rows alone rarely produce.
- Grip development: holding supramaximal weights forces forearm and hand adaptation; many lifters add 10–20 kg to their double-overhand capacity in a single block.
- Reduced lower-back fatigue: the shortened range spares the lumbar spine relative to full deadlifts, letting you train heavy pulling more often across a week.
- Confidence under heavy load: simply unracking and holding weights above your max desensitizes you to heavy barbells — a psychological edge that transfers to every big lift.
- Accessibility: any power rack works; no blocks, platforms, or specialty bars needed.
For physique athletes, the hypertrophy case is straightforward: rack pulls let you load the back with more weight for more reps than any row variation. For strength athletes, the carryover case is equally clear: a stronger lockout means fewer missed deadlifts. Our muscle development guides show how to pair them with accessory work.
Mistakes to Avoid With Rack Pulls
- Bouncing off the pins. Letting the bar crash down and rebound turns the lift into a cheat rep. Every rep starts from a dead stop — that is the entire point of the exercise.
- Setting pins too high. Above mid-thigh, the range becomes so short that the movement is mostly a shrug. Keep pins at or below the top of the kneecap for genuine pulling.
- Rounding the back. Heavy loads tempt lifters to round. If your lumbar spine rounds, the weight is too heavy — reduce load and rebuild. A rounded pull from pins is riskier than a rounded floor deadlift because the start position is already disadvantaged.
- Using them as an ego lift. The movement invites silly loading. If your full deadlift is 180 kg and you are “rack pulling” 260 kg from 10 cm of range, you are shrugging, not training.
- Neglecting full deadlifts. They are an assistance lift. Lifters who replace all floor pulling with pin work typically lose starting strength off the floor within 6–8 weeks.
- Skipping the brace reset. Rushing reps without re-bracing between them invites form breakdown under supramaximal loads. Take 3–5 seconds to reset on heavy sets.
Rack Pulls vs Deadlifts vs Block Pulls
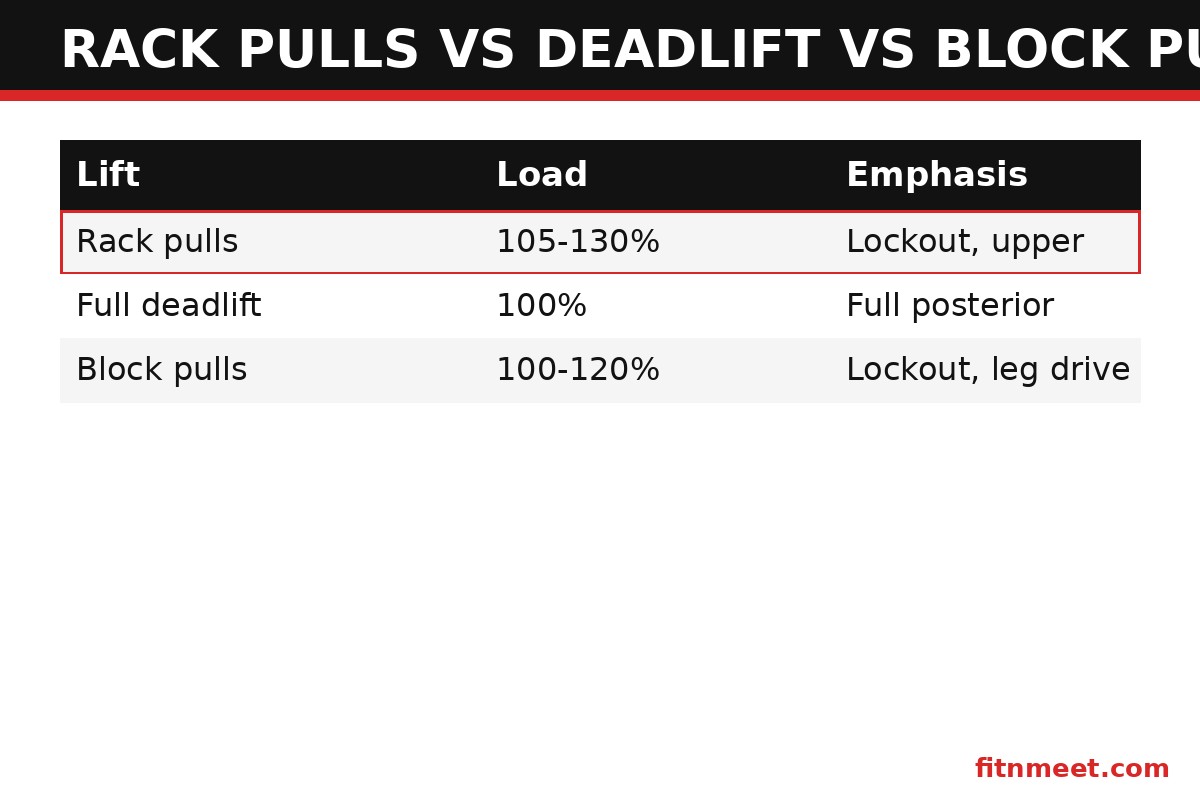
| Factor | Rack Pulls | Full Deadlift | Block Pulls |
|---|---|---|---|
| Range of motion | Partial (pins) | Full (floor) | Partial (blocks) |
| Typical load | 105–130% of deadlift max | 100% (baseline) | 100–120% of deadlift max |
| Primary emphasis | Lockout, upper back, grip | Full posterior chain | Lockout, slightly more leg drive |
| Lower-back stress | Moderate | Highest | Moderate |
| Equipment needed | Power rack | Bar + plates | Blocks or stacked plates |
| Bar whip/feel | Dead, rigid start | Natural flex off floor | Slightly softer than pins |
Block pulls are the closest cousin: the bar rests on blocks rather than pins, which gives a marginally softer start and slightly more leg involvement. Choose rack pulls when you want maximum convenience and the hardest dead stop; choose block pulls when your gym lacks a suitable rack or you want a touch more carryover to the floor pull. Both beat neglecting the lockout entirely.
Risks and Safety
Rack pulls are safe when set up correctly and risky when rushed. The non-negotiables: use a real power rack with rated safety pins (never improvise with benches or boxes), confirm both pins sit at identical heights, and keep collars on the bar — a sliding plate on a pin start can twist the bar violently.
The supramaximal loads demand respect for the spine. Brace as if for a max deadlift on every set, keep the lumbar spine neutral, and stop the set if form degrades. Lifters with existing disc issues should clear heavy partial pulling with a clinician first, since compressive forces at 110%+ of max are significant even through a short range.
Grip failure is the most common acute incident: a 130% load slipping from sweaty hands drops fast. Use chalk, consider mixed or hook grip on top sets, and use straps for hypertrophy work where grip is not the target — straps on rack pulls are smart training, not cheating, when the goal is back development. General strength training safety principles — progressive overload, adequate warm-up, and honest load selection — apply in full.
Rack Pulls FAQ
What are rack pulls good for?
Rack pulls build lockout strength, upper-back thickness, and grip strength by letting you handle 10–30% more than your full deadlift. They are a powerlifting assistance lift that also works well for back hypertrophy.
How high should the pins be for rack pulls?
Start with the bar at mid-knee to just below the kneecap. Lower pins (mid-shin) involve more leg drive; higher pins (above the knee) maximize load but shorten the range. Avoid setting pins above mid-thigh, where the movement becomes a shrug.
How much weight should I use for rack pulls?
Most lifters handle 105–130% of their full deadlift max from knee height. Start around 100–105% to learn the movement, then add load over 4–6 weeks. If your back rounds or you cannot pause at lockout, the weight is too heavy.
Are rack pulls better than deadlifts?
Neither is better — they do different jobs. Full deadlifts build total posterior-chain strength off the floor; rack pulls overload the lockout and upper back with supramaximal loads. Use rack pulls as assistance alongside deadlifts, not as a replacement.
Do rack pulls build muscle?
Yes. The heavy sustained loading of the traps, lats, rhomboids, and erectors makes rack pulls one of the best back-thickness builders available. Program 4 sets of 6–8 reps with a 1–2 second lockout hold for hypertrophy.
How often should I do rack pulls?
Once per week is ideal for most lifters, placed on back or deadlift day early in the session. Because loads are supramaximal, they fatigue the nervous system significantly — more than one heavy session weekly is rarely productive.
Should I use straps for rack pulls?
Use straps when the goal is back development and your grip gives out before your back does. Skip straps (or use mixed/hook grip) on strength-focused sets where grip adaptation is part of the goal. Chalk is recommended either way.
This article is for informational purposes only and is not medical advice. Consult a healthcare professional before starting any supplement or exercise program.
Conclusion
Rack pulls earn their place in any serious pulling program. They let you overload the lockout with weights your full deadlift cannot touch, build upper-back thickness that rows alone will not deliver, and forge grip strength under genuine supramaximal load. Set the pins at knee height, brace like it is a max attempt, pull from a dead stop — and watch your deadlift’s sticking point disappear.
Start light, progress weekly, and retest your full deadlift after 6 weeks — the carryover is the whole point. Browse FitnMeet’s training collection to support the heavy work ahead.